I apologize for more architectural views, the second time in a row. These images have not gone around in a folio in over ten years, and I don’t think ever in this folio. Although some of you have seen them before, others might appreciate the views as something new. Also, sorry about the relatively poor sharpness, a limitation of the technology available to me at the time I made these images, almost twenty years ago now.
In the mid aughts I discovered the amazing photography of Michael Wesely, who was then making waves with his experiments in long-exposure photography. Long exposure times measured not in minutes or even hours, but in years. His book “Open Shutter” reviews images of architectural landmarks all over the world, where exposure times of up to two years were used to capture the visual abstraction and semi-transparency of architectural transformation. I was much inspired by this, but I had to know: did Wesely do any of his work in 3D? Because the images of his that I had seen were supremely suitable for stereoscopic capture, showing as they did incredible complexity, depth, and semi-transparency in structures that were being built or even being torn down. I had a brief correspondence with Wesely soon after, and his answer was straightforward: he had not shot anything in 3D.
This gave me the green light, as it were. I am motivated in no small part by applying stereo photography to subjects and or techniques that remain relatively unexplored. However, in the case of Wesely’s long exposures, I was utterly out of my depth. I did understand he had used cameras with lenses (i.e. not pinholes) that were heavily filtered. But I had no way to know how heavy the filtering was, the effect of reciprocity failure in the photosensitive emulsions that he used, and/or how he compensated for those factors. I knew from the start that at best I would be able to merely simulate his technique using digital photography: capturing images at a given location multiple times over the course of many months (or indeed years), but taking extreme care to position and align the cameras exactly the same way for each image capture, then combining the resulting captures digitally.
Alas, the cameras I was using had “only” 20 megapixels (Canon D60 DSLRs) sensors, with subsequent post-processing and ultimately printing onto film causing further losses in resolution and sharpness. Sorry about that; I know you’re used to much better sharpness in MF3d! I hope the interesting technique and subject matter is an adequate offset to the arguably poor image quality. These film prints were done at a service bureau with a so-called film writer. Nowadays I could probably get better results using my Pentacon MF camera to shoot the images onto film as displayed on a 5K computer screen, but it would take a lot of film and processing to iterate to satisfactory exposure and screen settings.
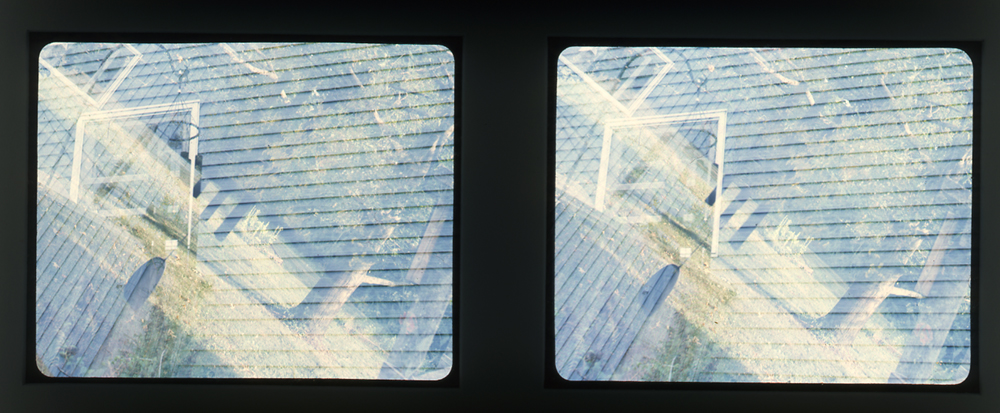
The biggest building I photographed using this technique of multiple exposures is Ruffin Hall, a new building for the Fine Arts program at UVA. Over the course of 2007 to 2008 I staked out six different points around the building, from which I captured images. Of those six, one was lost along the way due to a tractor trailer being placed right in front of my location, blocking the view of the site – but only after several months of construction (and image capture) had already commenced. Of the remaining five viewpoints, three resulted in quite interesting views, but the one I’m showing in this round is by far the best, because this viewpoint was the closest to the action, obtained from the roof of the neighboring Fine Arts Library.
 This image is a simple blend of six exposures taken over the course of some 18 months, with each exposure getting about equal representation in the final mix. This came close to the effect that Wesely had achieved with his ultra-long exposures. But I also discovered that the digital method opened up some creative opportunities that were closed off to Wesely and his wet-process emulsion-based long exposures. I could change the mix, change the transparency of the various images to achieve completely different results.
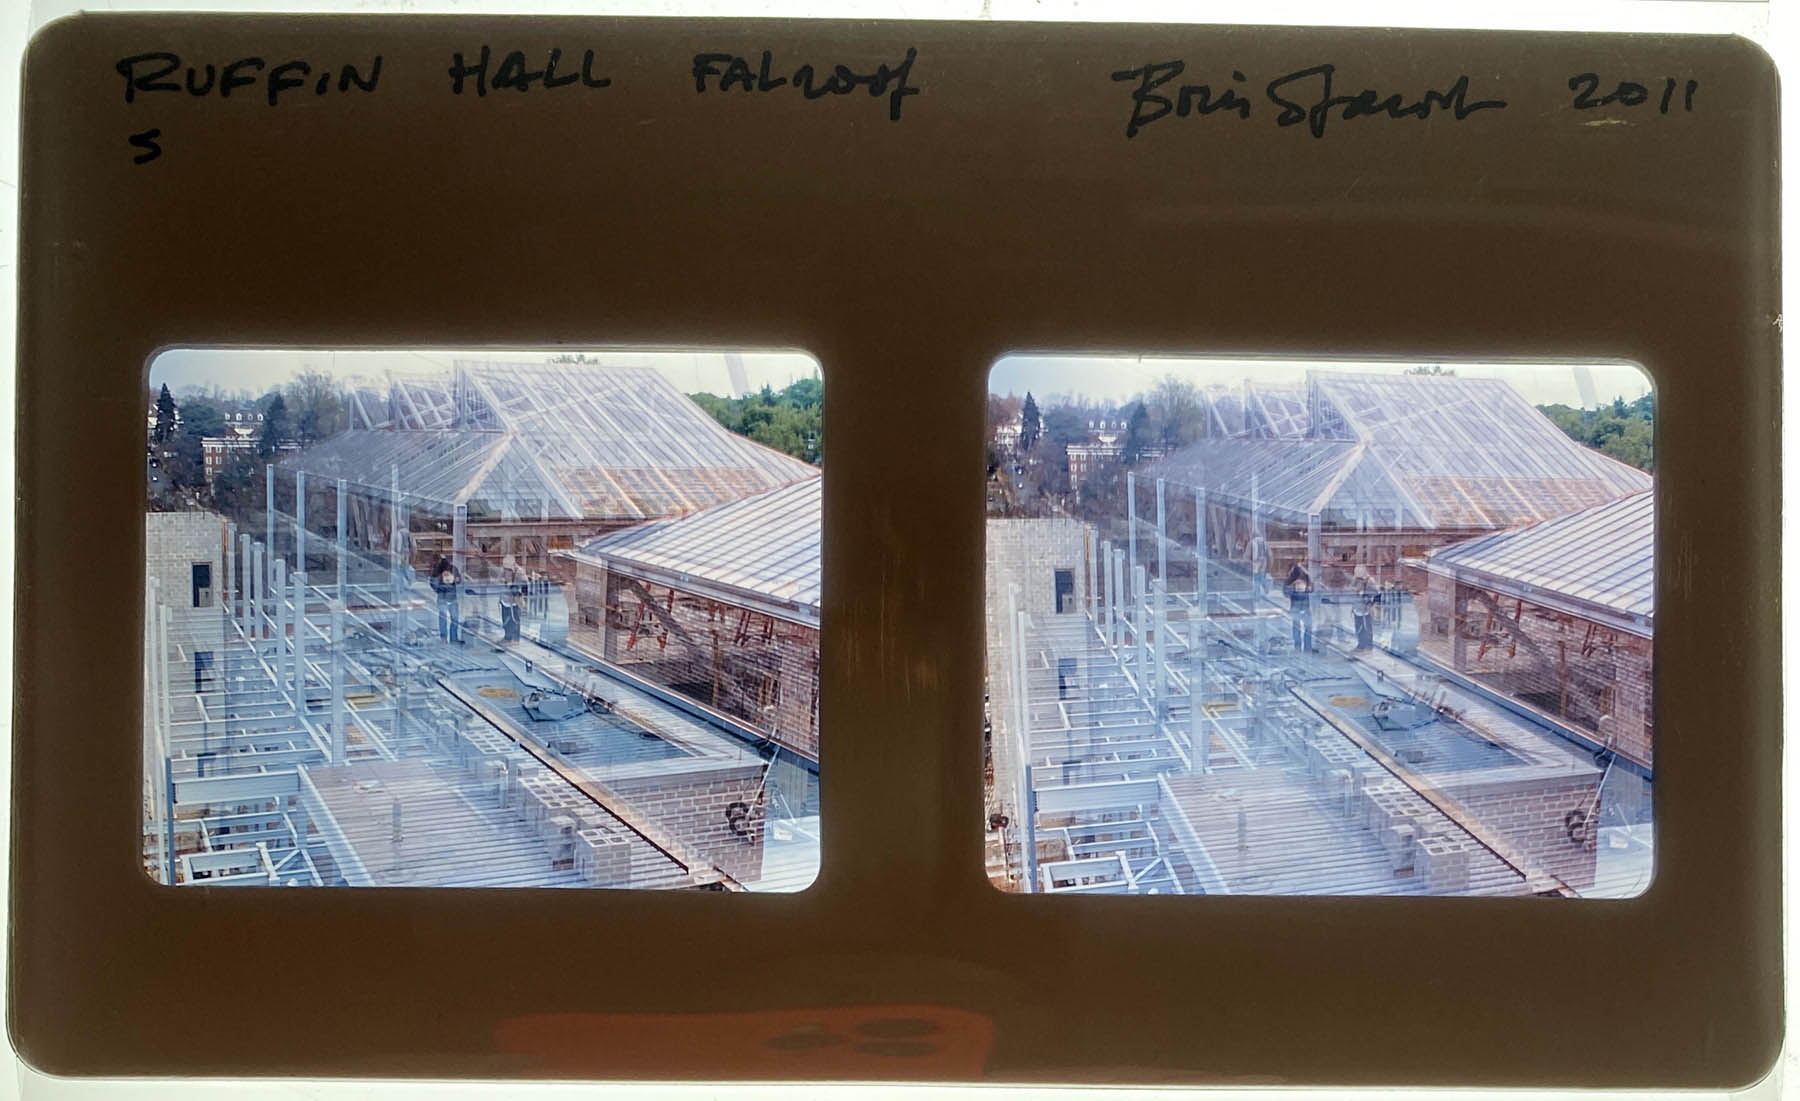 For example, in this second image of Ruffin Hall, I blended the images to show a progression of time, starting on the left side showing the earlier exposures, smoothly blending to the right side, where the building is shown finished. In-between, in the middle, is that delectable semi-transparent structural complexity that can be appreciated best only in 3D. By a pure lucky coincidence, some men in the middle of the image are conversing, but one pair of the men were photographed at a completely different time than the second pair of men. It looks almost like they are all conversing together in a time warp!
In the many views obtained of this and other buildings in those years, final composition was a matter of luck and some imagination. Depending on the site and building, I might have had a chance to look at some plans or an architect’s model, and from these inputs, I had to decide on where to place and how to point the cameras. Two more buildings came out quite well.
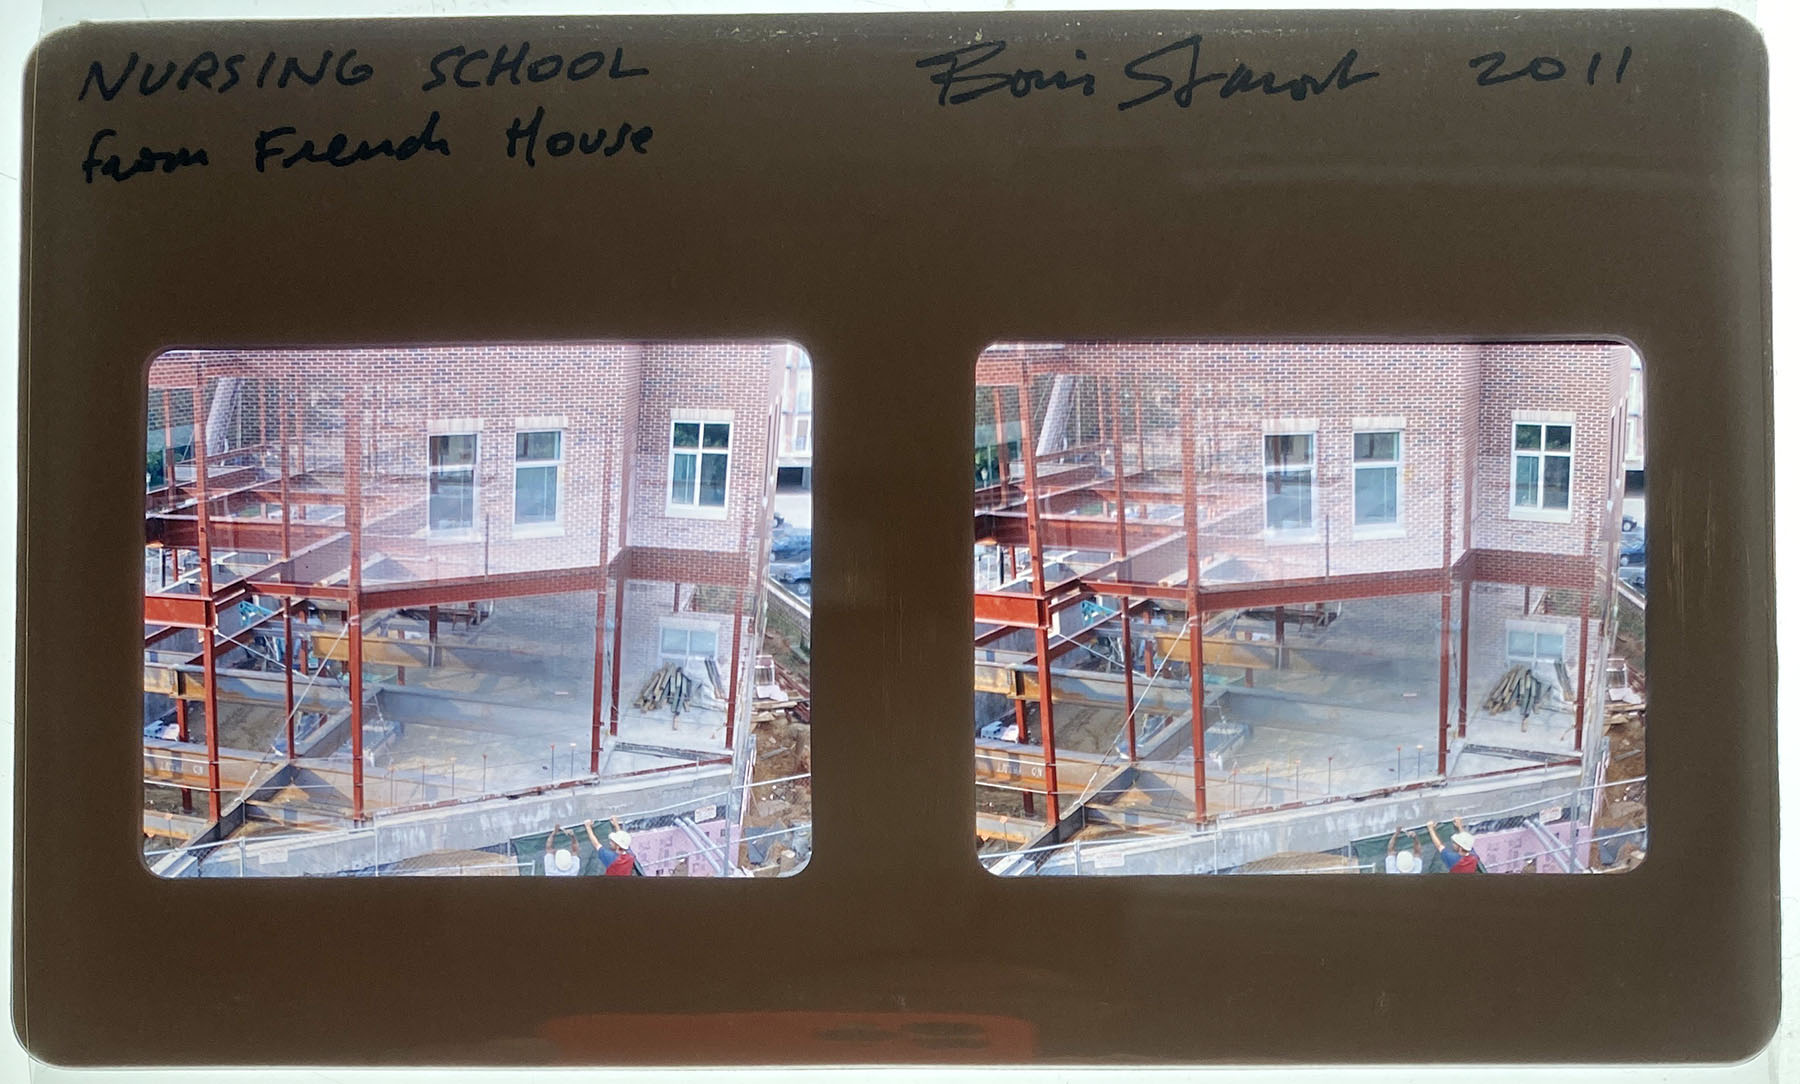 Like the Ruffin Hall image above, for a new Nursing School building I blended the various images so that a progression can be seen progressing diagonally from the earliest imagery in the lower left, to the upper right side, showing the finished exterior.
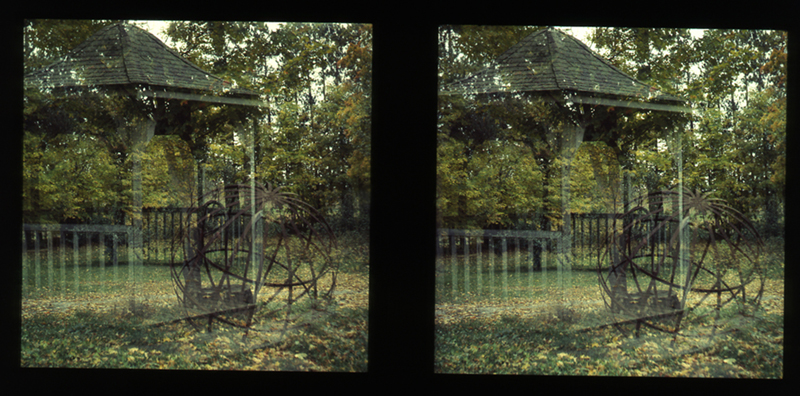
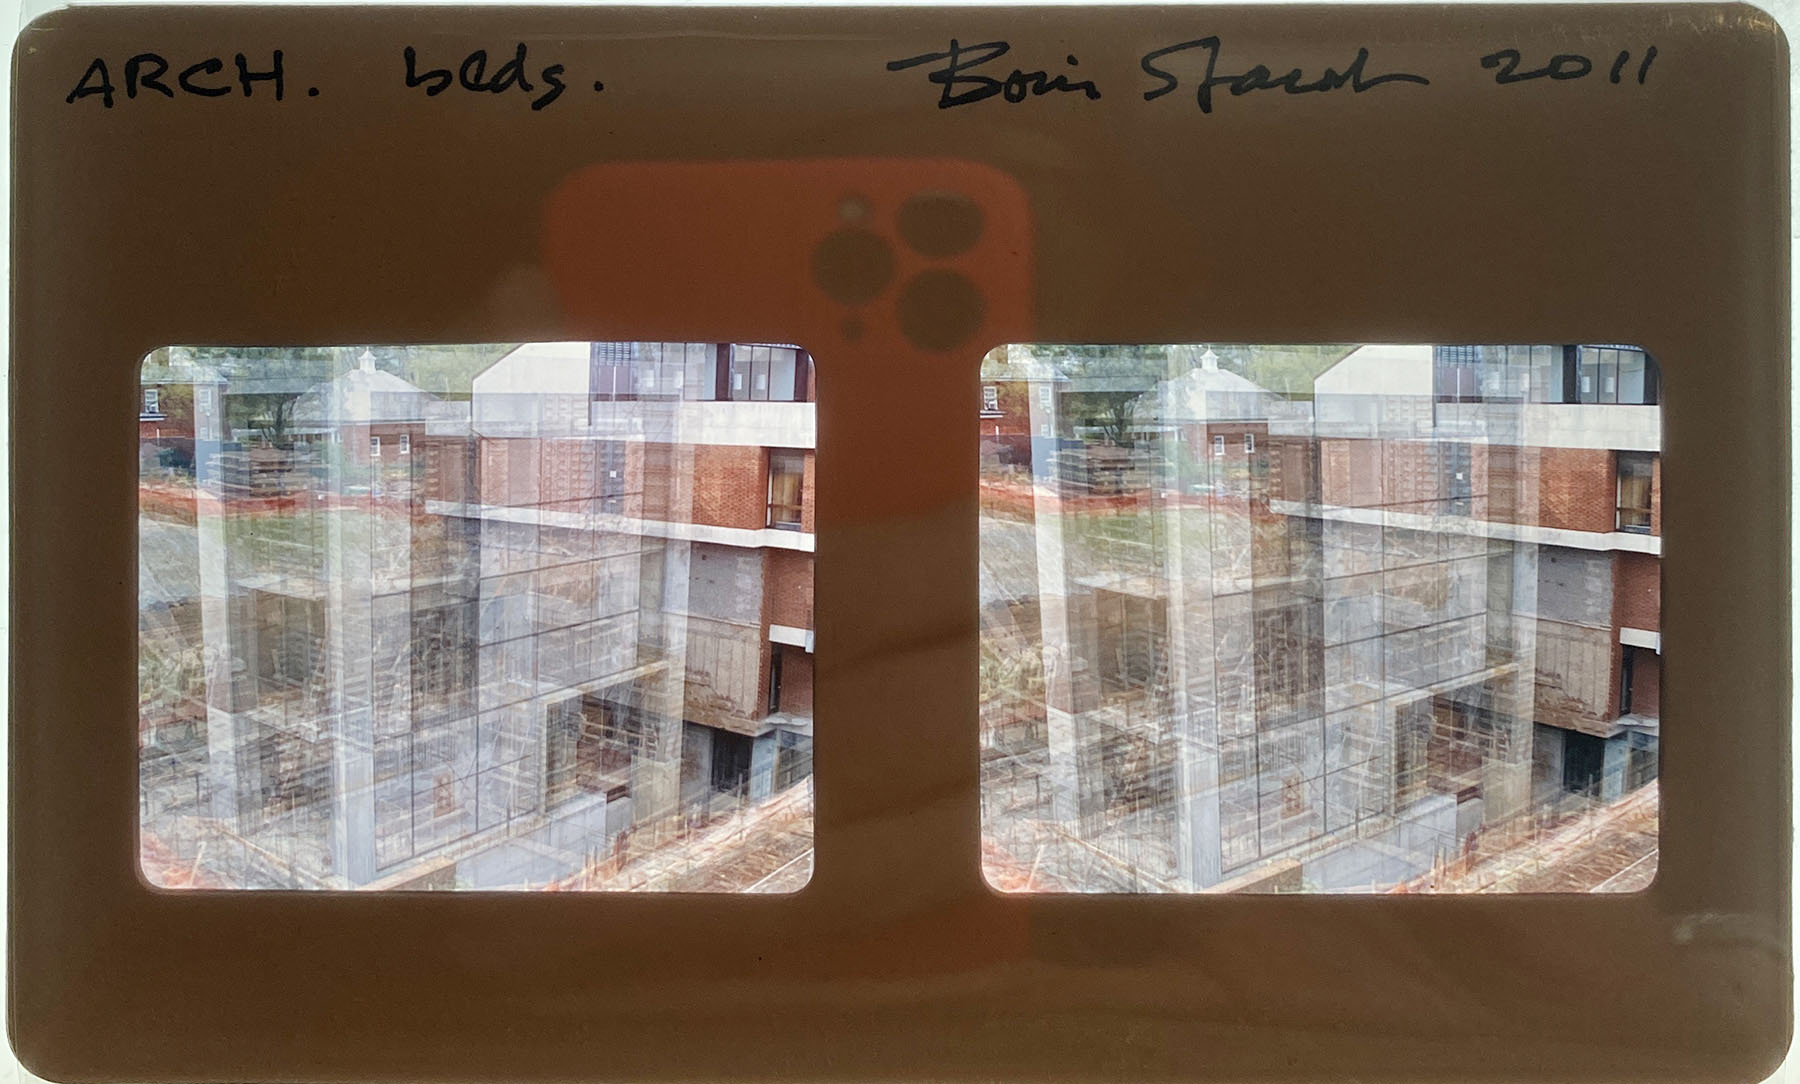 The ARCH bldg. is an addition to UVA’s School of Architecture, and you can see for this version I did a simple blend to make it look like a Wesely-style long exposure.